


At a glance
Nuts are a nutrient-dense, high-fat food that supports cardiovascular health and can fit well within a ketogenic diet. However, not all nuts are equally keto-friendly, and choosing low-carb varieties is vital to maintain ketosis and effective fat burning. Understanding which nuts are most suitable for your keto health goals helps maximize both nutrition and results.
While nuts are a natural, whole food that can be an excellent addition to a nutritious, low-carb diet such as Healthy Keto®, not all types of nuts are suitable for a ketogenic diet.
Discover the best nuts for keto and learn how to incorporate these nutritional powerhouses into your low-carb lifestyle without disrupting ketosis or fat-burning.
Six reasons to eat nuts on the keto diet
Excluding nuts from your keto lifestyle means missing out on a powerhouse of health benefits.
Packed with healthy fats, fiber, and essential nutrients, nuts support heart and brain health, enhance memory, and help your body combat inflammation and infections.
Here are six reasons why nuts are an excellent choice for keto.
1. Rich sources of healthy fats
To maintain ketosis and benefit from fat-burning, it’s crucial to focus on high-fat, low-carb foods.
Keto-friendly nuts deliver high-quality fats essential for energy production, hormone balance, and the absorption of fat-soluble vitamins. They’re an ideal, nutrient-rich source of fat that fully supports the metabolic state of ketosis.
2. Low in carbs
To trigger and maintain ketosis, it’s essential to keep your net carb intake under 50 grams per day. Choosing the right nuts can help you achieve this as they deliver healthy fats and essential nutrients without the carb overload.
3. Support satiety
Due to their high fat and fiber content, nuts slow digestion and promote a lasting feeling of fullness.
This increased satiety can help curb cravings and reduce the need to snack between meals, making nuts a powerful ally in your weight loss journey.
4. Nutritional powerhouses
Tree nuts boast an impressive nutrient profile, as they’re packed with essential vitamins, minerals, antioxidants, and phytosterols, which are plant compounds known to support healthy cholesterol levels and overall heart health.
According to research published in Nutrients, regular nut consumption is linked to a reduced risk of heart disease and improved blood pressure regulation.1
The authors of this study summarize, “In conclusion, nuts are nutrient-rich foods with wide-ranging cardiovascular and metabolic benefits, which can be readily incorporated into healthy diets.”
5. Delicious
From crunchy whole nuts to creamy nut butters, there’s no shortage of delicious and nutritious options. For a fun, satisfying treat, try these Keto Almond Butter Pine Nut Bombs.
These rich, nutty, and slightly sweet bites can win over even the most picky eaters and prove that a keto diet is far from restrictive or boring.
6. Versatile ingredients
Nuts are incredibly versatile and simple to incorporate into your diet. They’re easy to store, require little preparation, and can be used in a variety of ways.
For example, some nuts can be blended with water and strained to create creamy, dairy-free alternatives like almond milk—a keto-friendly staple that’s both nutritious and delicious.
Watch the video below to learn about the best keto nuts for a low-carb lifestyle.
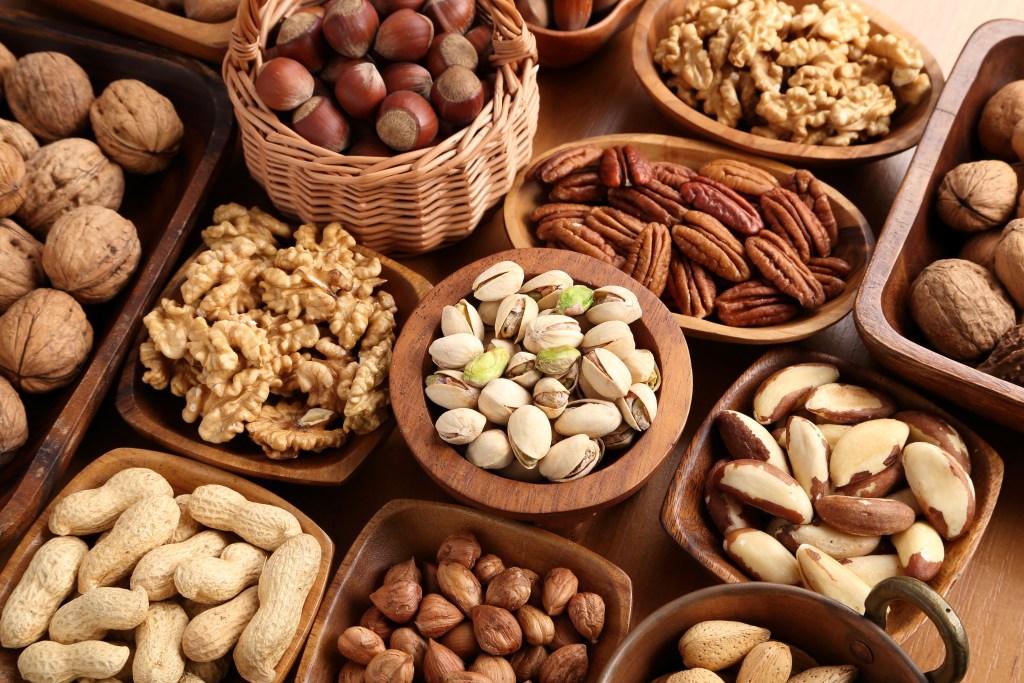
The best and worst nuts for keto
While many types of nuts make excellent additions to a keto diet, not all are low in carbs or equally beneficial.
Some nuts are higher in carbohydrates, and others contain significant amounts of phytic acid, a naturally occurring compound known as an anti-nutrient.
Phytic acid can interfere with the absorption of key minerals such as iron, zinc, and calcium, potentially reducing their bioavailability, especially if nuts are a major part of your daily intake.
When following a Healthy Keto lifestyle, it’s important to choose nuts that not only support ketosis but also offer a strong nutritional profile.
Top choices include pecans, Brazil nuts, and walnuts, all rich in healthy fats, magnesium, selenium, and omega-3 fatty acids.
Here’s a list ranking popular nuts from the most to least keto-friendly.
1. Brazil nuts
Brazil nuts are packed with nutrients and offer a range of health benefits, thanks in part to their high selenium content, a trace mineral essential for enzyme activity, thyroid function, detoxification, and supporting a healthy liver.
A study published in the International Association of Bioinorganic Scientists suggests that a keto diet may increase the risk of selenium deficiency if not carefully planned and well-formulated.2
Therefore, adding Brazil nuts to your keto routine is a smart choice to support nutrient levels, promote thyroid functions, and enhance overall health and well-being.
Here’s a breakdown of the nutritional content of a 3.5-ounce (100-gram) serving of Brazil nuts:
- 659 calories
- 14.3 g protein
- 67 g fat
- 11.7 g total carbs
- 7.5 g fiber
- 4.2 g net carbs
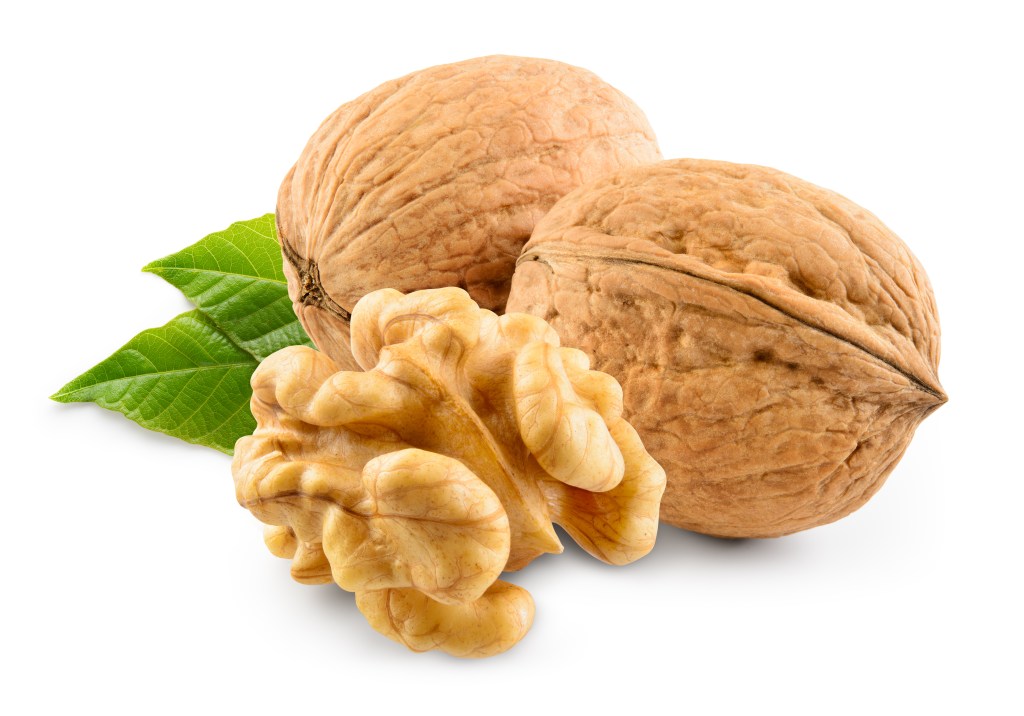
2. Walnuts
Walnuts are a nutrient-dense nut rich in vitamin E and polyphenols, powerful antioxidants that support heart health, promote healthy digestion, and help maintain balanced cholesterol levels.
A few tasty keto recipes include Keto Walnut Spice Loaf and Keto Spiced Nuts recipe.
Because walnuts can quickly go rancid, it’s best to eat them fresh or store them in an airtight container.
Below is a detailed nutritional breakdown of a 3.5-ounce serving of walnuts:
- 679 calories
- 14.6 g protein
- 69.7 g fat
- 10.9 g total carbs
- 5.2 g fiber
- 5.7 g net carbs
3. Pecans
Pecans are an excellent source of healthy fats, making them ideal for a keto lifestyle. As nutrient-rich tree nuts, they also provide valuable minerals, including calcium, magnesium, and potassium, all key nutrients that help support healthy blood pressure.
Pecans can be used as a salad topping, and if you’re looking for a treat, try this Easy Keto Candied Pecans recipe.
Let’s look at the nutritional value of pecans per 3.5 ounces:
- 750 calories
- 9.9 g protein
- 73 g fat
- 12.7 g total carbs
- 5.8 g fiber
- 6.9 g net carbs
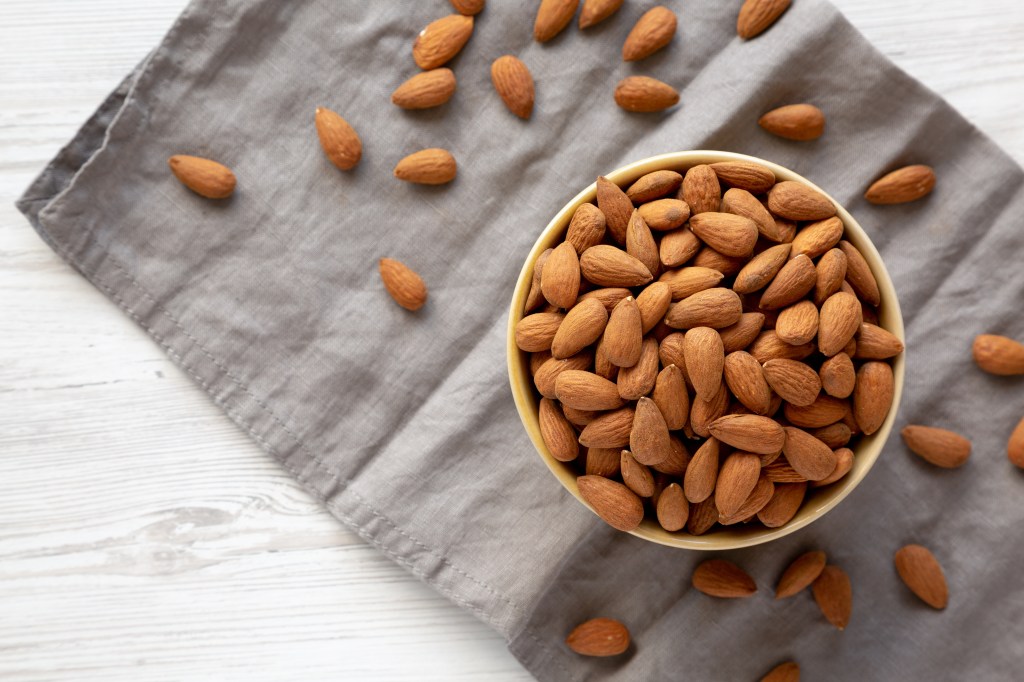
4. Almonds
Almonds are another excellent keto-friendly nut, low in carbs and high in fat.
This gluten-free nut is incredibly versatile and works well in nutritious versions of classic treats, such as Keto-Friendly Almond Butter Cookies and Keto Pumpkin Muffins.
In addition, almonds offer vitamins and trace minerals, including vitamins B and E, as well as iron, zinc, calcium, magnesium, and copper, which provide various health benefits and optimal nutrition.
Here’s the nutritional composition of a 3.5-ounce serving of almonds:
- 626 calories
- 21.4 g protein
- 51 g fat
- 20 g total carbs
- 10.8 g fiber
- 9.2 g net carbs
5. Pine nuts
Pine nuts are edible seeds harvested from the cones of pine trees.
They feature a soft, buttery texture and are abundant in essential nutrients such as vitamins E and K, phosphorus, magnesium, manganese, zinc, and copper. Like other nuts, pine nuts contribute to heart health and can support weight management.
A 3.5-ounce portion of pine nuts contains:
- 689 calories
- 15.7 g protein
- 61.3 g fat
- 18.6 g total carbs
- 3.9 g fiber
- 14.7 g net carbs
6. Macadamia nuts
Macadamia nuts are exceptionally healthy. While they contain more carbs than Brazil nuts, walnuts, pecans, or almonds, they’re rich sources of beneficial fats.
You may be concerned that the higher amounts of carbs in macadamia nuts will kick you out of ketosis. But don’t worry—the high fat content will buffer the carbs’ impact on your blood sugar and insulin levels, making macadamia nuts a keto-friendly option.
Here’s the nutritional breakdown of a 3.5-ounce serving of macadamia nuts:
- 669 calories
- 7.7 g protein
- 64.9 g fat
- 24.1 g total carbs
- 7.6 g fiber
- 16.5 g net carbs

7. Peanuts
Peanuts have an excellent fat-to-carb ratio and can be a good option for your keto diet.
They’re also loaded with healthy monounsaturated fats, plant-based protein, fiber, and essential nutrients such as vitamin E, magnesium, and folate, making them a satisfying and nutrient-dense treat when enjoyed in moderation.
Try making this Keto Peanut Butter Cups recipe, featuring a creamy peanut butter center wrapped in a silky chocolate coating, creating an irresistible treat sure to delight your taste buds.
Almond and walnut butter are good alternatives if you’re allergic to peanuts or want to experiment with other low-carb ingredients.
A 3.5-ounce serving of peanuts contains:
- 588 calories
- 23.2 g protein
- 43 g fat
- 26.5 g total carbs
- 8 g fiber
- 18.5 g net carbs
8. Pistachios
Pistachios are a rich source of antioxidants, which help protect against harmful cellular damage and may reduce the risk of heart disease.
However, due to their relatively high carb count, limit yourself to 2 to 3 ounces (57 to 85 grams) and choose shelled pistachios. The extra effort to crack open the shells will naturally slow you down and control portion size.
The nutritional composition of 3.5 ounces of pistachios is as follows:
- 598 calories
- 20.5 g protein
- 45 g fat
- 27.7 g total carbs
- 7 g fiber
- 20.7 g net carbs
9. Cashews
Cashews are the least keto-friendly nuts, as their high carb content can quickly push you over your daily net carb limit and disrupt ketosis.
It’s best to avoid these nuts and opt for other, more keto-approved varieties.
A 3.5-ounce serving of cashews contains:
- 565 calories
- 17.4 g protein
- 38.9 g fat
- 36.3 g total carbs
- 4.1 g fiber
- 32.2 g net carbs
How many nuts can you have on keto?
If you’re new to the ketogenic diet, your body may still be adapting, and the high fat content in nuts can sometimes overwhelm your digestive system, leading to bloating, gas, or cramps.
To ease this transition, start by introducing low-carb nuts in small amounts and gradually increasing your intake as your body becomes keto-adapted.
If you are following keto to lose weight, aim to keep portion sizes to no more than 1/4 cup of nuts or one tablespoon of nut butter per meal. This approach helps you stay within your daily carb limits while allowing your digestive system time to adjust to the higher fat intake.

Who shouldn’t have nuts: nut sensitivities, allergies, and intolerance
While nuts can be keto-friendly, you must avoid them if you’re sensitive, allergic, or intolerant.
Let’s explore how these conditions differ and what that means for your wellness.
Nut sensitivity
People with digestive issues and kidney stones can be sensitive to nuts. If you’re prone to digestive problems, lectins in nuts can cause many symptoms.
“Lectins are sugar-binding proteins found in nuts that may cause bloating, pain, and discomfort around your stomach and liver,” explains Dr. Berg.
Nuts high in lectins include peanuts, cashews, almonds, pine nuts, and hazelnuts.
Nut intolerance
Nut intolerance symptoms are similar to nut sensitivity but commonly only cause intestinal symptoms.
If intolerant, your body will respond with inflammation to one or several proteins in nuts. Common symptoms of nut intolerance are bloating, stomach pain, cramps, and diarrhea.
You may be intolerant to all kinds of nuts or just one type. Listen to your body and make adjustments to your keto diet as necessary.
Nut allergies
A nut allergy results from a severe immune system response to the proteins in nuts. Allergic reactions can be serious, even life-threatening, and happen immediately after exposure to nuts or eating nuts.
Some common symptoms of nut allergies include coughing, nausea, stomach pain, sneezing, diarrhea, vomiting, and runny eyes.
If you experience any signs of a nut allergy, especially difficulty breathing, swelling of the face or throat, dizziness, or severe hives, seek emergency medical attention immediately. Always consult with a healthcare professional for proper diagnosis and management of nut allergies.

How to germinate nuts
Germinating nuts is an ancient technique that enhances their digestibility, making it an excellent option if you find nuts hard to digest.
Soaking nuts activates natural enzymes and breaks down compounds that can interfere with digestion, reducing digestive discomfort while boosting their nutrient availability.
Simply soak nuts overnight, then dehydrate them at low temperatures to preserve their texture and nutritional benefits.
Key takeaways
- Keto-friendly nuts include Brazil nuts, walnuts, pecans, and almonds, all of which are rich sources of healthy fats, fiber, and essential nutrients that support metabolic and cardiovascular health.
- Cashews and pistachios are higher in carbs and can disrupt ketosis if eaten in large amounts.
- It’s recommended to start with small portions to help the digestive system adapt to the higher fat content of nuts.
- Individuals with nut sensitivities or allergies should avoid nuts and consult a healthcare professional for guidance.
FAQ
- 1. Are nuts high in carbs?
- 2. Are nuts considered low-carb?
- 3. Can I eat nuts on keto?
- 4. Will nuts kick me out of ketosis?
- 5. Can I have nuts while fasting?
- 6. Which nuts should I avoid on keto?
- 7. What are the best nuts to have on a keto diet?
- 8. Which nuts contain the fewest carbs?
Sources
Related Articles
-
How to Break a Weight Loss Plateau: 9 Simple Ways
 Keto
KetoHow to Break a Weight Loss Plateau: 9 Simple Ways
At a glance Weight loss plateaus typically occur when the body adapts to dietary and lifestyle changes, resulting in reduced energy requirements. Factors such as insulin resistance, poor sleep, and…05/08/2026 -
Why You’re Not Losing Belly Fat on Keto
 Diet
DietWhy You’re Not Losing Belly Fat on Keto
At a glance Shedding stubborn belly fat may require more than cutting carbs. Insulin levels, stress hormones, liver function, and muscle mass all influence how efficiently your body can access…02/20/2026 13k views -
12 Fat-Burning Foods To Accelerate Weight Loss
 Weight loss
12 Fat-Burning Foods To Accelerate Weight Loss
At a glance Certain foods can support fat loss by promoting satiety, stabilizing blood sugar, and enhancing metabolic health. Eating nutrient-dense options such as oily fish, grass-fed beef, leafy greens,…01/22/2026 18.1k views -
10 Keto Zucchini Recipes You Must Try – Low-Carb & Gluten-free
 Keto
Keto10 Keto Zucchini Recipes You Must Try – Low-Carb & Gluten-free
At a glance Zucchini is a low-carb, nutrient-rich ingredient that’s perfect for a health-focused keto diet. It provides dietary fiber, vitamin C, potassium, and antioxidants, and can be used as…01/16/2026 1.9k views -
Red Meat: Benefits and Disadvantages Explained
 Nutrition
Red Meat: Benefits and Disadvantages Explained
At a glance Red meat offers essential nutrients such as protein, iron, zinc, and B vitamins that support muscle repair, energy metabolism, and brain health. However, nutritional quality varies widely,…01/08/2026 7.5k views -
Why You’re Not Losing Weight on Keto
 Diet
DietWhy You’re Not Losing Weight on Keto
At a glance Ketosis is a metabolic state where the body shifts from using carbohydrates to burning fat for energy. It occurs when carbohydrate intake drops low enough for the…12/12/2025 7.6k views -
9 Fast Fat-Burning Methods That Actually Work
 Diet
Diet9 Fast Fat-Burning Methods That Actually Work
At a glance Eating habits strongly influence whether your body enters fat-burning mode by shifting how it produces energy. When carbohydrate intake stays low, blood glucose levels fall, allowing the…12/12/2025 23.3k views -
11 High-Calorie, Low-Carb Foods
 Diet
Diet11 High-Calorie, Low-Carb Foods
At a glance High-calorie, low-carb foods can help you gain weight and build muscle without relying on high-carb meals that may contribute to insulin resistance and low energy. Emphasizing healthy…12/05/2025 -
How to Burn Fat Naturally – 4 Proven Strategies
 Diet
DietHow to Burn Fat Naturally – 4 Proven Strategies
Losing weight doesn’t have to mean unsatisfying meals, endless cardio workouts, or eating fewer calories. The key to efficient fat burning isn’t deprivation or excessive exercise—it’s about restoring your body’s…11/13/2025 -
The 4 Best Exercises to Lose Weight
 Diet
DietThe 4 Best Exercises to Lose Weight
At a glance The best exercises for weight loss support hormone balance, encourage metabolic flexibility, and build lean muscle to support ongoing fat burning. Pairing strategic movement and proper recovery…10/24/2025


